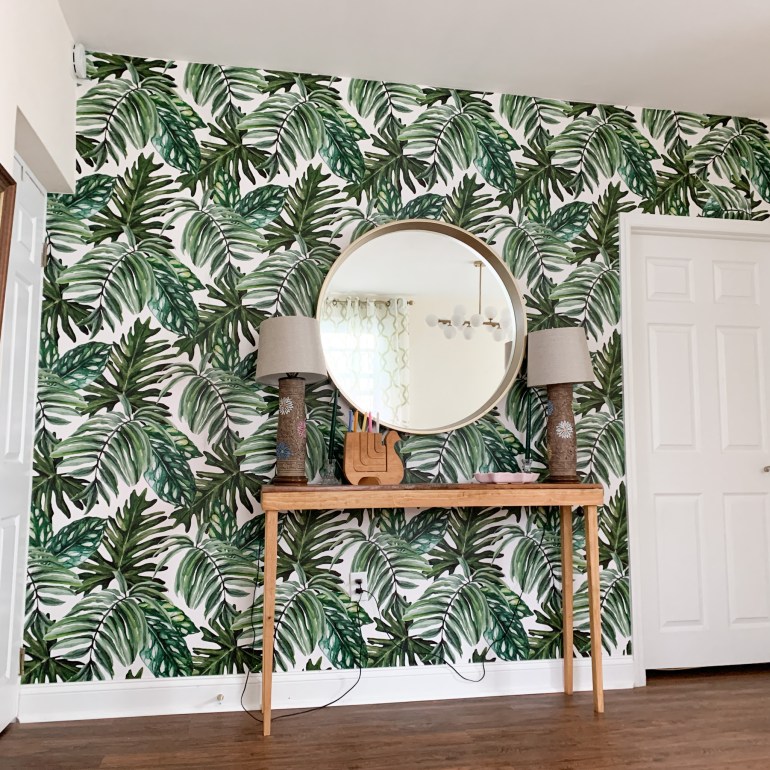
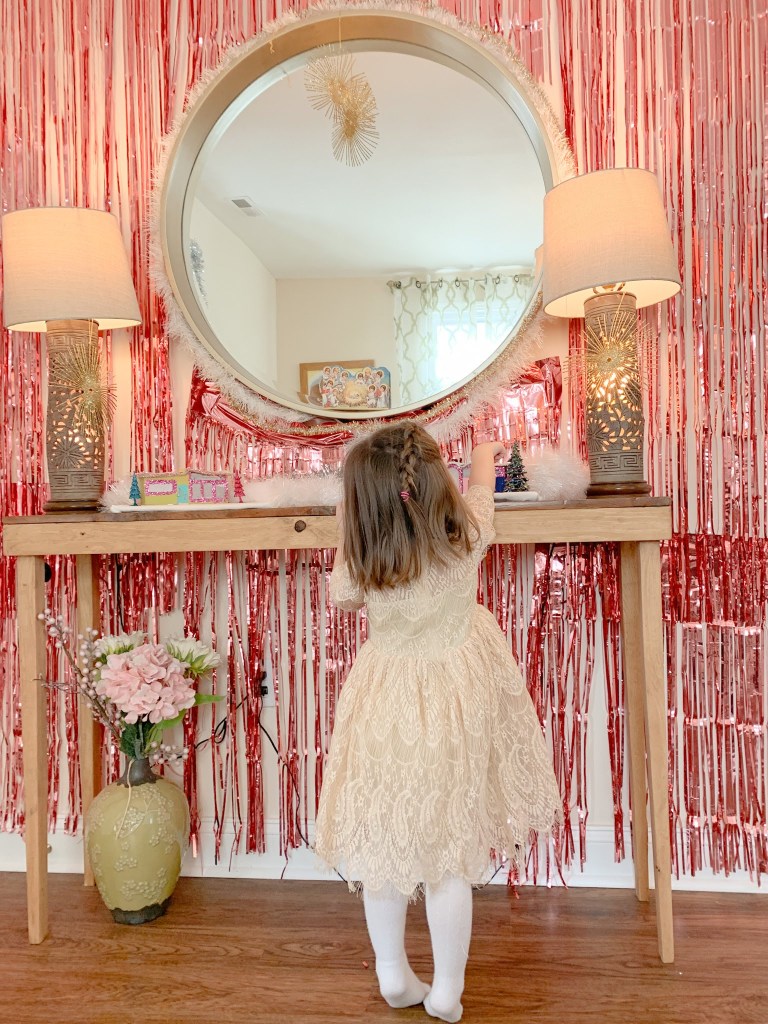
We have one teeny accent wall in our dining room that houses two former DIY projects: the console table and the mirror we sprayed gold. It’s quickly become the most worked over spot in our house and we’re not done yet! After putting up pink tinsel on this wall for Christmas we decided this space needed something bold and fun all year round.
What better way to do that than to add some colorful wallpaper? There are so many peel and stick options I thought it would be a quick weekend job but like everything it was more involved than picking and sticking. Here are some of the options we considered….

The wallpaper samples were about $11 and took about a week to get to me but I have to say they’re life savers. Once you see a sample on the wall it makes a big difference. If it’s big enough you can tell right away if it will work. I have so many samples now I swear I could wallpaper a small bathroom with them. I still couldn’t decide if I like the fern print so Robbie photoshopped some designs onto a picture of that wall. If you know how to do this I HIGHLY SUGGEST YOU DO! It’s the best way to get an idea of what it will look like in the space and it’s FREE!! I spent so much on samples I’ll never do that again.

#1 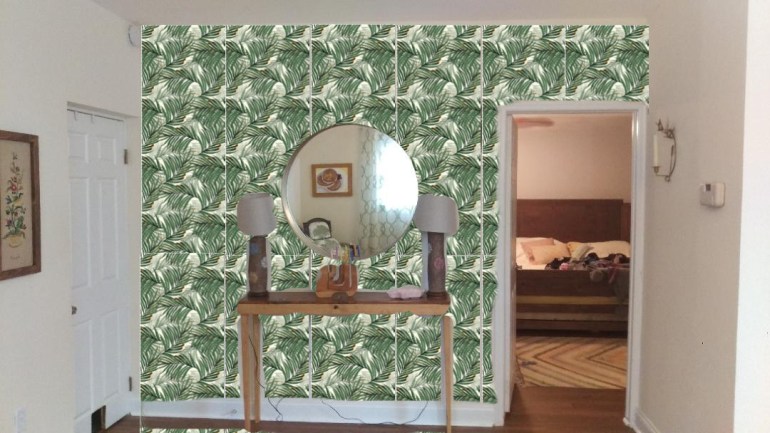
#2 
#3
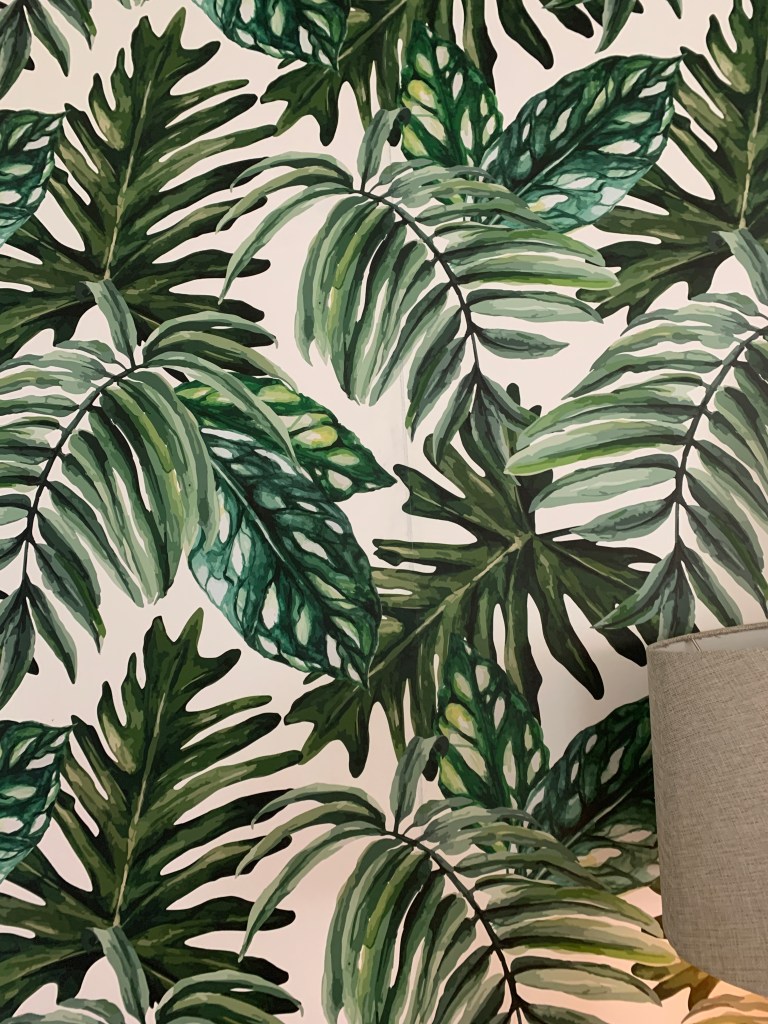
What a difference once you see it on the walls right? #2 was my favorite hands down until I saw the final product on the walls. I’m now leaning towards the first one because it’s not as dark and the print isn’t as tight. Again – if you can photoshop the options on a picture of your space first – we suggest you do!
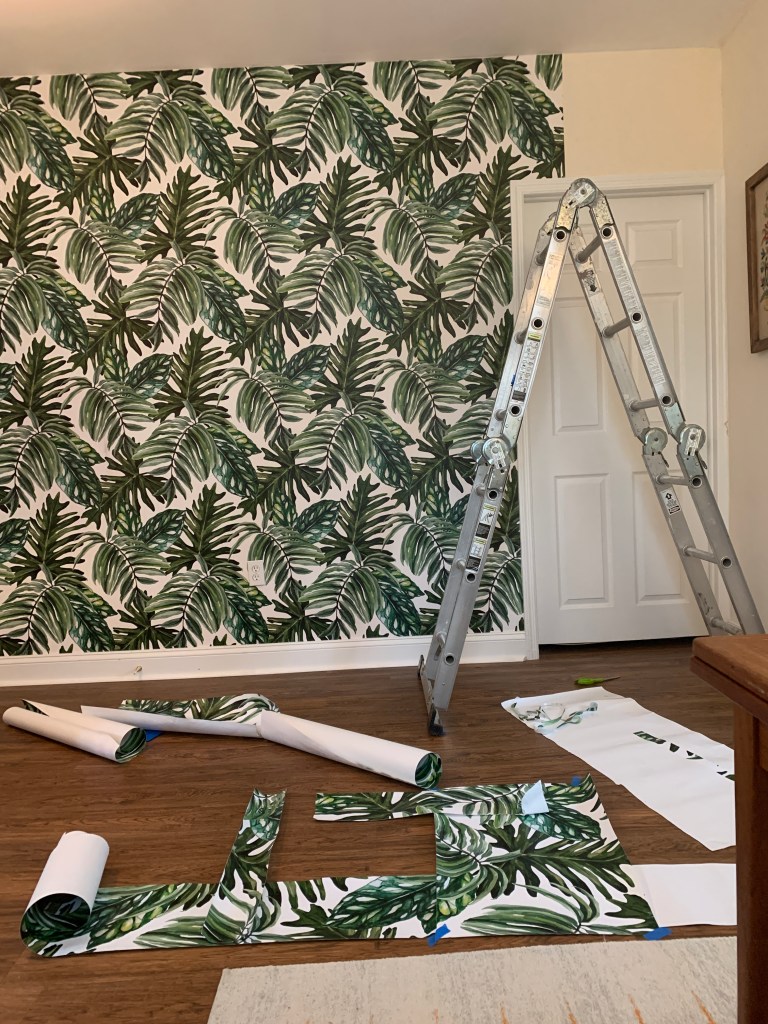
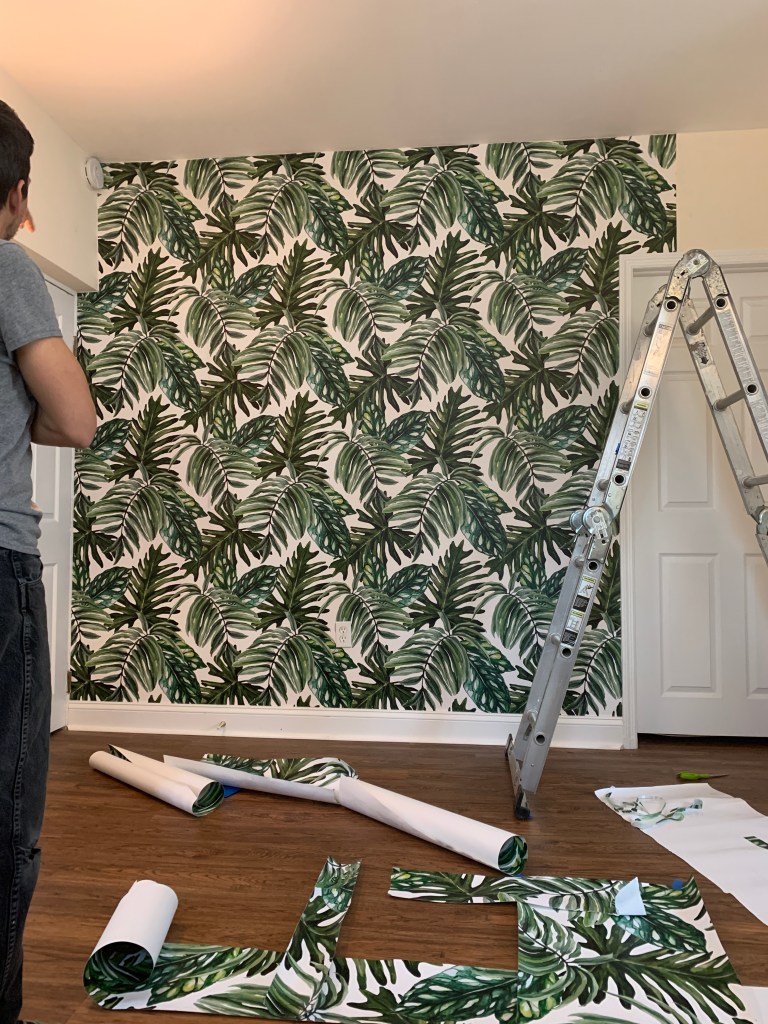
We were so excited to get the 4 rolls of wallpaper during the quarantine – there’s no better project than wallpapering a wall when you’re stuck inside. We got our peel and stick wallpaper from https://musewallstudio.com/ She delivered it fast and even helped me with a credit card mistake I made. Check out her great site if this is something you want to do. There are also sooo many options on Home Depot’s website and of course Etsy.
We learned a few things about removable wallpaper that we’ll pass on to you. One is to go left to right and it’s best to measure the width of the panel and draw a LIGHT pencil line to line up the edge with. I say light because we drew ours very dark and surprise! It popped through the paper. You can see the dark pencil line even after we erased it. The paper is A LOT more see-through than we thought. You can even see the pink paint swatch I painted under the white area. Fortunately the pattern is so loud your eye isn’t drawn to the pencil marks – so phew but beware!

The other tip is to pre-tape the paper onto the wall before laying down the sticky side. That way you can match the graphics and make sure it doesn’t start to line differently the farther down you go. We learned that even if it’s off a little it doesn’t show so be as exact as you can but don’t sweat minor off-areas.
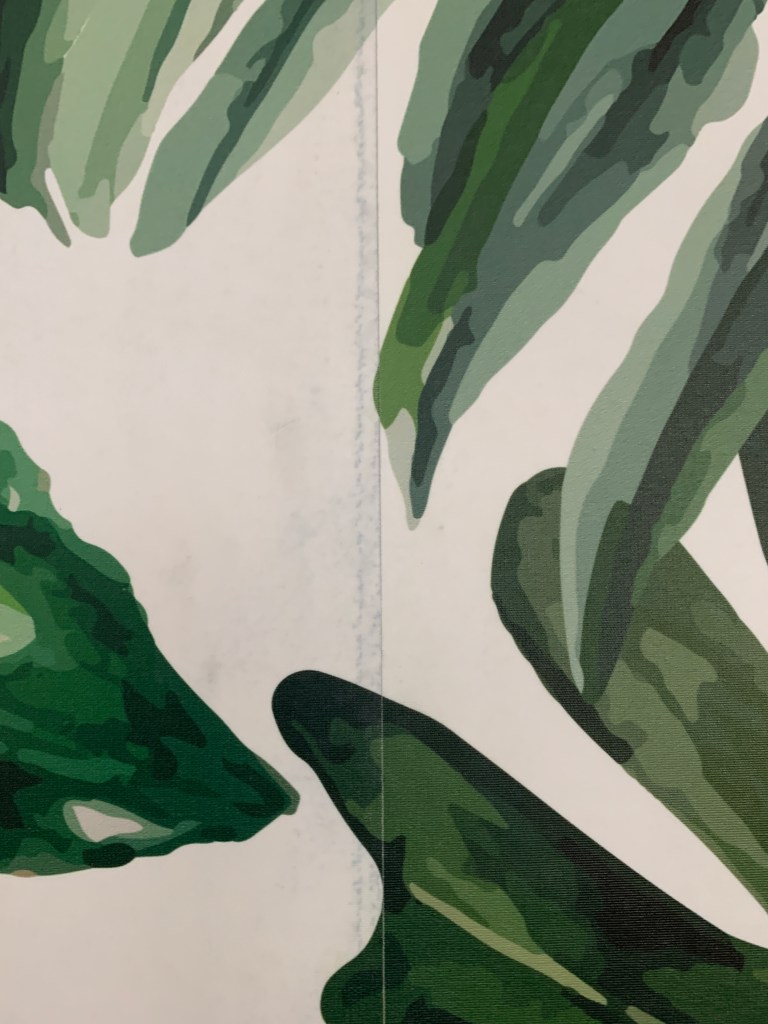
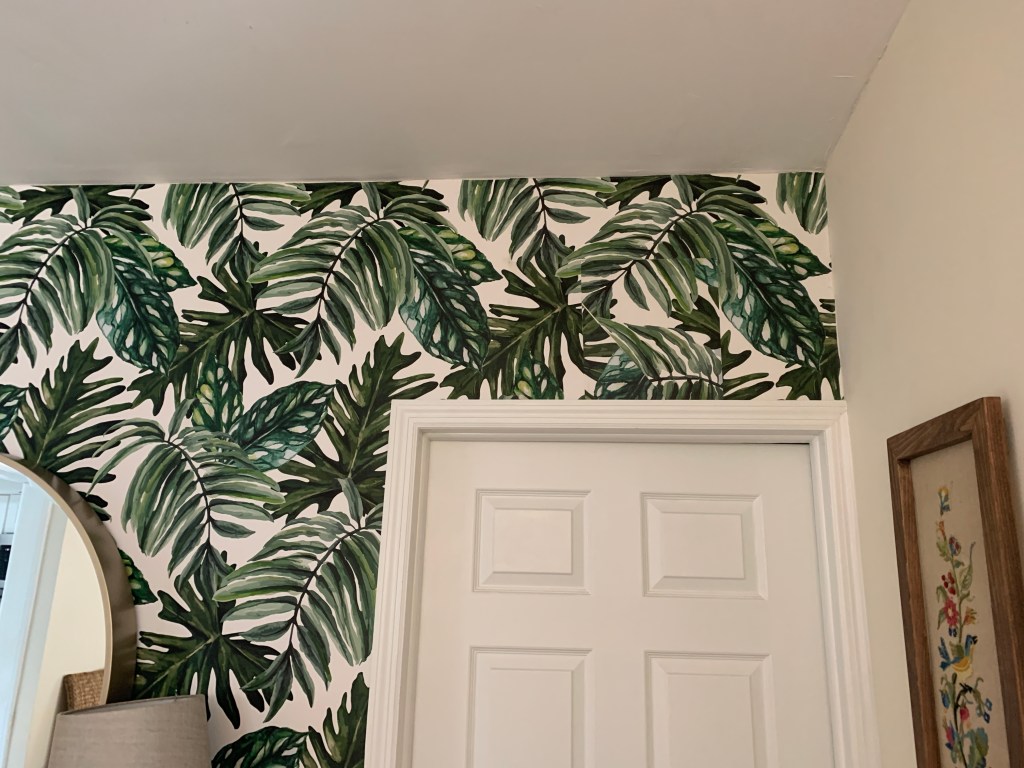
We ordered 4 rolls thinking we’d have enough extra to cover the area above the door and we were wrong! We had plenty of paper but none matched the pattern correctly. We didn’t want to order an entire extra roll so Robbie stared at it for about an hour and figured out different pieces that *sort* of worked.

You definitely can’t tell when you look at the wall that there are panels that don’t match but because I like you I’ll show you a close up of his sneaky work!


Here’s the process sped up into a 1 minute video! It actually took about 4 hours not counting the arguments we had about “not communicating” well with each other while taping the panels up. Teeeeheeee!

